
Every month, the team at VA Partners take some time to work on personal development projects. This is especially important for sales and marketing professionals because our landscapes are continuously changing.
This month, Hootsuite launched their new course – Advanced Uses of Hootsuite. We use Hootsuite as our primary social media management tool. Like many tools, I have gotten used to carrying out my daily routines, without necessarily taking the time to explore what sort of new features will make me more efficient. We’re always looking for new ways to amplify our social presence.
Here are 5 quick tips from the course:
1. Assign Tasks
If you’re managing a larger team as part of your social plan, Hootsuite certainly offers a number of benefits to set up your organization to help move through approval processes and activities. One of those features is the ability to assign tasks to different team members within Hootsuite. If an inquiry comes in through social, this feature gives you the ability to forward the message to the most appropriate contact. For those working solo on managing social media, you can also assign a message to yourself as a reminder to respond to at a later time.
2. Monitor Local Audiences
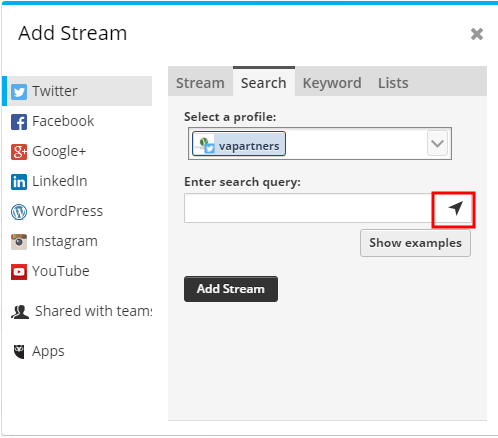
If you want to connect with your local audience and businesses, a geo-targetted social search may be just what you need. This feature allows you to add a stream to your Hootsuite dashboard that specifies both search terms and a limited by a km radius.
To do this, click Add Stream and select Search. Then, fill in your search terms and click on the arrow to indicate local search. The default setting is a 25km radius from where you are currently located. If you want to customize the location and radius look up the address on Google Maps and insert the geo code after your search term, followed by the radius you want to monitor. Here’s an example of what this might look like: marketing geocode: 43.664566, -79.341054,10km.
3. Customize the Publisher Tab
The default view of the Publisher tab is a list of all posts from all your social networks. To get an better idea of what is happening on an individual account, you have the option of selecting a specific account from the drop down menu to filter by social account. You also have the option to view your posts by day, week or month for a different visual experience. In these views, you can drag and drop posts to fill gaps or make quick changes.
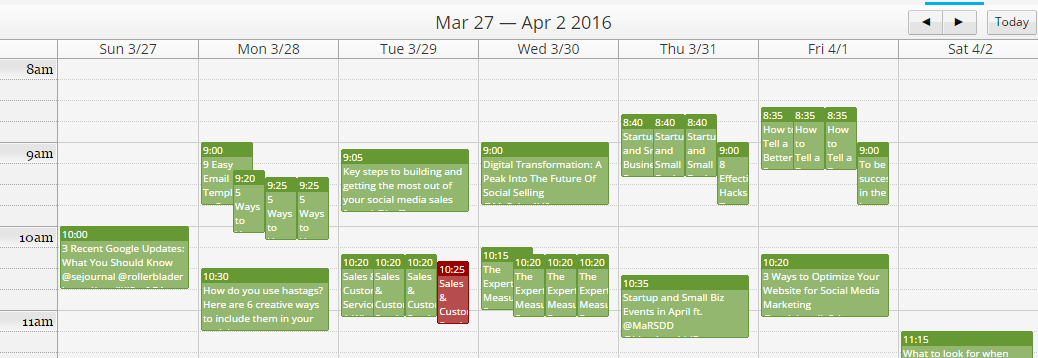
4. Troubleshoot Failed Posts
One of the other great features in the Publisher tab is the ability to check previously schedules posts. Here you will get an overview of all your successfully sent posts in green. If you come across a red post, it means that the message wasn’t sent. A good best practice to enable email notifications to trouble shoot failed posts.This option is found under the notifications tab under settings.
5. Save Messages as Drafts
We believe that evergreen content is great to share on social media. We try to schedule in older blog posts, white papers, and newsletter archives into our social post mix. A great feature to keep these posts within Hootsuite is the ability to save messages as drafts. Drafts are saved to include both images and links.
If you’d like to learn more on social media management for business, download our free white paper, Twitter for Sales and Marketing or LinkedIn for Sales and Marketing.
